Before doing the base I had to wrap up the lid. My initial plan was to weld an iron pipe cap to a piece of electrical conduit that would be an arm to hold the cap (with a hole) in place. I was having one heck of a time trying to get the cap welded to the conduit. Maybe it was just a thermal mass issue and if I’d held the heat longer I’d eventually have gotten the cap to sufficient heat… I eventually gave up as the arm kept getting dislodged, bad semi-welds happening, etc.
Instead, I mounted the lid and created a “basket” from welding rod. It’s not pretty, but should help keep the arm in place. Whether my whole assembly is strong enough to support the cap, or whether I’ll need some additional shoring up I’m not sure at this point. Back to this issue later…

So, I then removed the cap and baked it to sturdy up the paint and drive off water and start burning out some volatiles in the refractory. I did a nice slow ramp (at least it seemed slow) from 250 to 550 F. I held at 250 for about an hour then went up about 50 F every 20 minutes in the oven. The “real” burnout will happen with the burner up to full temp, but at least there won’t be any significant water left to crack it and the paint is now toughened.
So, onto the base…
The first thing I did was re-level the top edge. When the cap was on, I noticed that the gap between the two varied at a couple of points. With a pair of pliers to unbend/re-bend the edge, I managed to get it relatively level.. not perfect, but better.
So, onto the casting… I cut two disk of 1″ inswool and placed them in the center. I cut a PVC pipe “drain” and used duct tape to seal the seam. The pipe angles over the inswool and will fit into a cavity in the refractory that will serve as a funnel for spills. Small chunks of foam were pushed against the walls to lighten the base and reduce the amount of costly refractory needed. Both good things! I could/should have made them wider probably, but I had these pieces on hand. The foam should burn out when it gets up to temp.

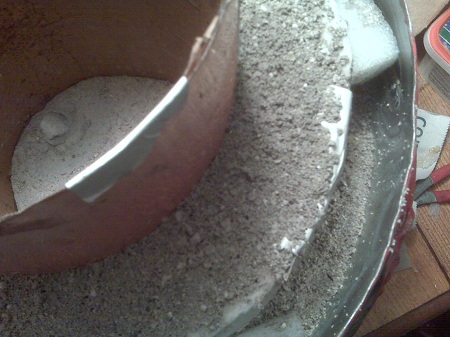
After I let it harden overnight, I cut the foam down to be even with the refractory and created my forms. The outer cylinder is formed by the inswool, and the inner cylinder is formed from a roll of copper flashing. Note the foam plug to create the propane inlet cone and the cut-away from the inswool to allow refractory to surround it all the way to the walls of the furnace shell.

Now it is just a matter of scooping in the refractory and packing it down so that it flows into all of the proper crevices. Keeping the copper cylinder in place and shape is somewhat challenging. Doing it over again, I’d put refractory all the way around the base first and build up from all sides.

So, it’s drying now… after that happens I’ll be stuffing the gap between the inswool and the metal shell with additional inswool to increase insulation value. At most points it should have more than 2″ of inswool and 1.25″ of 3000 degree refractory (with additional insulation.)
After the gaps are filled, then I’ll go overtop to create a seamless refractory lid for strength/rigidity and to give a better base for the lid to sit on.
More pictures in this post when complete…

[…] Casting the Base […]